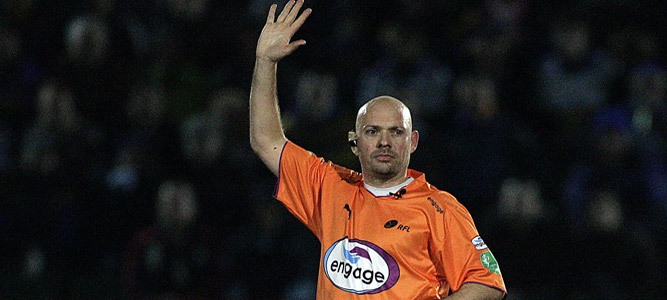
Courtesy of the Rugby Football League
- The simple aim of Rugby League is to score more points than your opponent.
- A Rugby League match lasts for 80 minutes (two 40 minute halves). Timekeepers monitor this and sound a siren or hooter as a signal to the ref when the game is over
- You score tries (worth four points) by touching the ball down over your opponent’s try line. You can convert that to six by kicking a goal. The other means of scoring are a penalty goal (also worth two points) and a drop goal (worth one point).
- There are two teams of 13 players with four reserves on the interchange bench. Each team can make a maximum of 12 changes involving any combination of players. Rugby League players have to be multi-skilled but some players do focus on roles within their teams including carrying the ball into the opposition line (forwards), attacking on the fringes (backs) and distributing the ball (hooker and half backs). All players work together in their team’s defensive formation.
- The ball has to be passed backwards. It can be passed as many times as you like until a player is tackled in possession
- Each team has the ball for six plays (or tackles). After a tackle, the ball carrier plays the ball back along the ground to a receiver standing behind directly behind them. After the six plays are completed the team in possession must handover the ball to the opposition. Most teams elect to kick at this point in order to gain as much ground as possible.
- Six players form a Rugby League scrum. They are a means of re-starting the game and create a good opportunity to attack. Scrums are awarded for knock-ons (losing the ball forward) or forward passes.
- You are offside in Rugby League if you are within the gap maintained between the attacking and defensive sides by the referee or if you interfere with play after being in front of a team mate when they have kicked the ball in open play.
- A 40-20 kick is when a player kicks the ball behind his own 40 metre line and it bounces into touch within the opposition’s 20 metre line. If this happens the side that kicked the ball get the advantage of putting the ball into the resulting scrum. A goal line drop out is taken from under your own posts if you have been forced to touch the ball down in your own in-goal area or put the ball out of play in this area.
Understanding Positions
Full-Back (1)
A full-back is often the most complete player on the team. The full-back is usually the last line of defence and often the first player making the break in attack. They need the safest hands in the team.
They are responsible for catching the opposition’s high and testing kicks in attack. A full-back can suddenly turn defence into attack, make important last-ditch tackles and make the extra man in attack.
Wing (2 & 5)
Speed is what the winger is all about – and you need plenty of it. But to be a truly dependable winger, you need to pick up those difficult passes in tight spaces.
So as well as the speed of a sprinter, you need hands like glue – the ball needs to stick to you every time you get it.
But don’t think you’re only responsibility is in attack. Often the winger can be the last line of defence, so you need to be able to make those important tackles when they count.
Centre (3 & 4)
The centre is always in the thick of things, whether in attack or defence. They should be comfortable creating space for wingers as well as making that last-ditch tackle. Centres can expect to do plenty of running up and down the pitch.
Stand-Off (6)
The stand-off is the brains of the team – the player who makes the important decisions in attacks. A brilliant stand-off has the kicking skills of an international footballer. Whether it be a place kick, a drop kick or just a plain old punt, the stand-off needs to make every kick count.
They also need to be as good a passer as their half-back partner, the scrum-half. They also have to make the big tackles under pressure when it counts.
Scrum-Half (7)
The scrum-half is the link between the forwards and the backs. They can expect to make plenty of passes to team-mates.
Scrum-halfs need to have the safest pair of hands on the team – as well as a brilliant rugby league brain. They are the player who makes the important passes, and need to make the right pass at the right time. The scrum-half is the player who feeds the ball into the scrum.
Prop Forward (8 & 10)
Front row forwards must enjoy bashing their way through tackles and making big tackles when they count.
They are also the first line in the scrum, so can expect plenty of tussles and battles with their opposite number. As always, they need excellent ball handling skills and a good rugby league brain.
Hooker (9)
The hooker probably makes more contact with the ball than any other player on the field. They often are the players who act as the dummy half after a play the ball, swinging the passes out or breaking down the opposition’s defence.
As the centre of the scrum, the hooker is the player whose job it is to win the ball from the scrum-half’s feed. Then, on top of that, they are expected to make plenty of tackles when they matter.
Second Row (11 & 12)
Like the prop forwards, the second rows get stuck in at the deep end. Making tackles and breaking down the opposition’s defence are two things every second rower loves doing.
On top of that, they are also an important part of the scrum, providing the power behind the front row. As always, a good pair of hands and a good engine are required to be a quality second row.
Loose Forward (13)
The loose forward will always be found in the thick of the action. It is a job that requires plenty of running, so they need to be super fit.
Not only that, loose forwards have to have excellent handling skills and a defence as tough as iron. They will generally top the tackle count at the end of the game. And as the last man in the scrum, it is the responsibility of the loose forward to make sure the ball is available for the scrum-half.
Interchange (14, 15, 16, 17)
If a player is injured or just not playing well enough, they can be replaced by a substitute, called an interchange.
Each team has four interchange replacements to choose from and can they come on at anytime during the game. Most interchanges are tactical, but they can also come on for any player who has been sent to the blood bin with an injury. But the interchange cannot replace any player who has been sent to the sin-bin.


